Configuring Servers
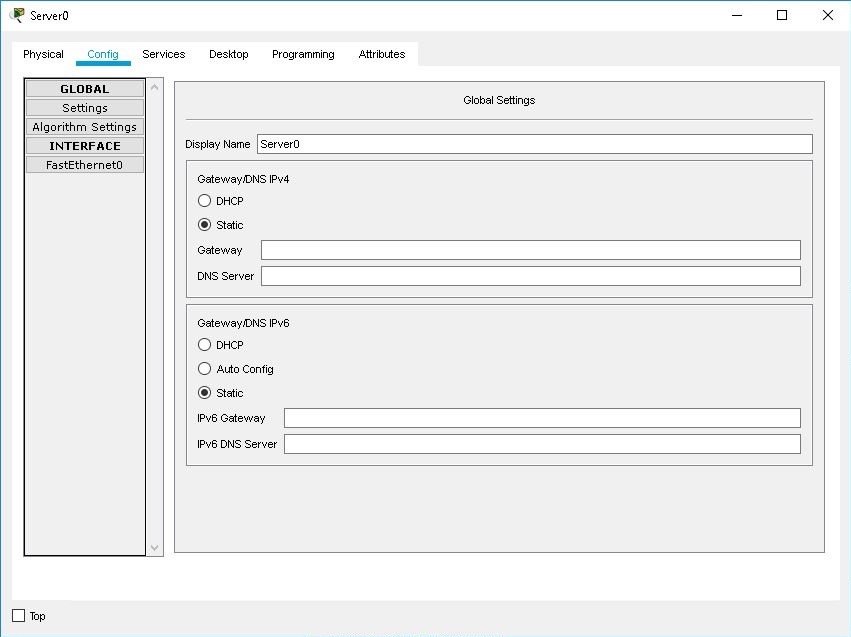
The Config tab offers two levels of configuration: global, and interface. To configure at the global level, click the GLOBAL button to expand the Settings button (if it has not already been expanded). To configure an interface, click the INTERFACE button to expand the interface, and then choose the interface. The server also has the Services tab that provides access for service configurations. Lastly, it has the Desktop tab that provides tools to configure IP settings, open a host command line interface, and generate PDUs.

Global Settings
In the global settings, you can change the Display Name of the server. You may set the server to either automatically obtain IPv4 or IPv6 configurations by selecting the DHCP button or manually set the Gateway and DNS Server using the Static button. For IPv6, Auto Config will automatically configure the Gateway and DNS Server IP addresses and Static allows the data to be manually supplied.
Algorithm Settings
In the Algorithm Settings, you can override the global Algorithm Settings by removing the check mark from Global Settings and then setting your own values for the Maximum Number of Connections, Maximum Number of Opened Sessions, and Maximum Retransmission Timeout in Milliseconds.
HTTP Service Configuration
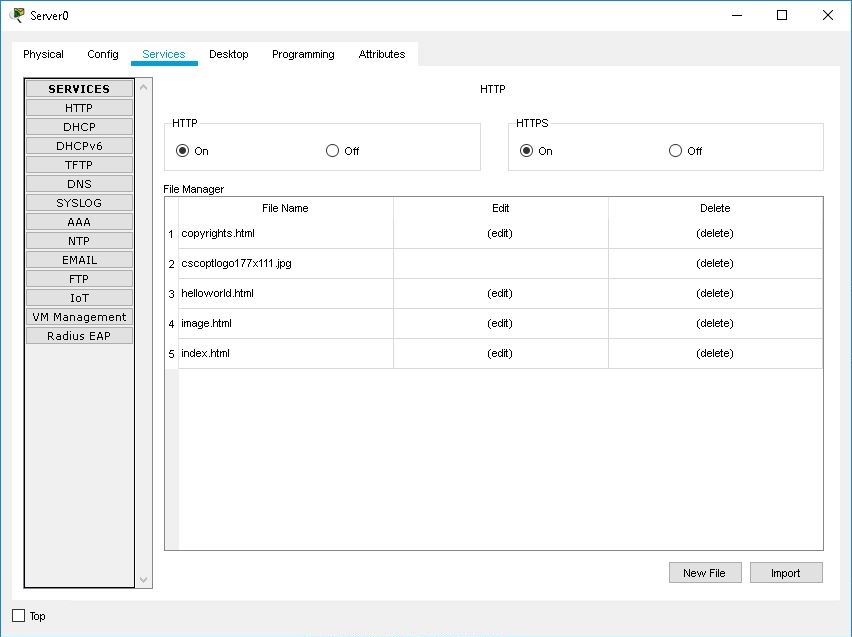
In the HTTP service configuration, you can edit the included HTML pages such as index.html, helloworld.html, and image.html. HTML tag support reference is available here: QtWebkit Guide.
Additionally, you can also add or remove HTML files from the server. When a PC accesses an HTML page on the server using the Web Browser, the HTML page will load in the Web Browser.
DHCP Service Configuration
In the DHCP service configuration, you can set up a DHCP server with many different IP address pools. To add a DHCP pool, enter the Pool Name, Default Gateway, DNS Server address, Starting IP address to lease, Subnet Mask, and the Maximum number of Users, then click Add. If you want to make changes to an existing DHCP pool, select the pool from the list and edit the fields you want to make changes to, and then click Save. If you want to remove a DHCP IP address pool from the server, select the pool from the list and click Remove.
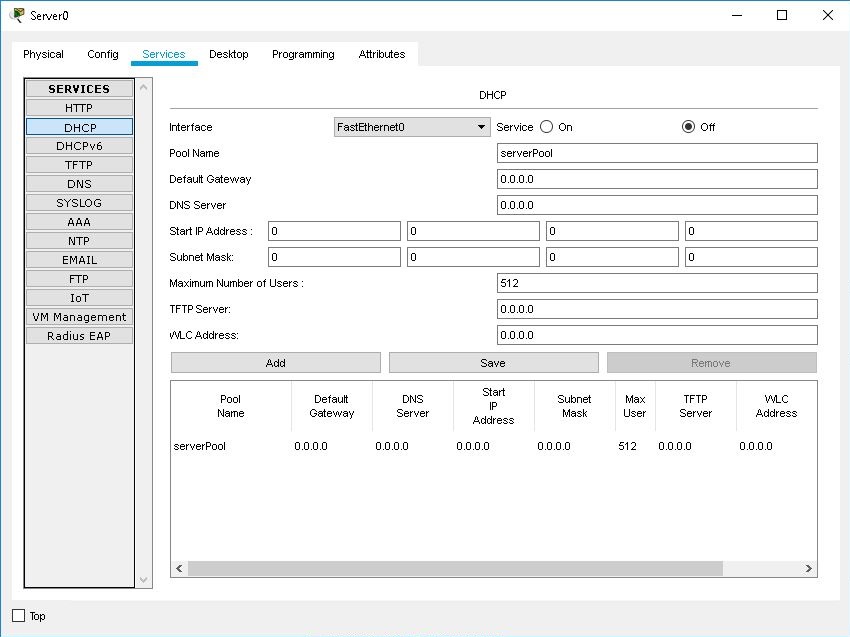
The default DHCP pool serverPool cannot be modified or edited. |
TFTP Service Configuration
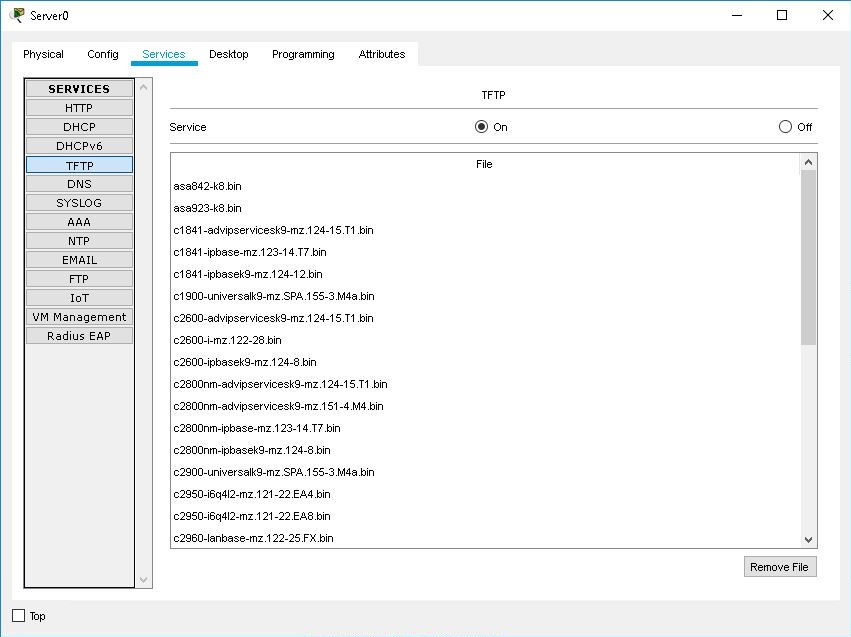
In the TFTP service configuration, there are no parameters to set. The TFTP service contains a selection of IOS images that can be used to flash routers and switches. If you want to remove an IOS image from the server, select the IOS image from the list and click Remove.
DNS Service Configuration
In the DNS service configuration, you can set up a DNS server to translate domain names with different types of resource records, which are basic data elements in the Domain Name System. Packet Tracer currently supports four different types of resource records: Address (A), Canonical Name (CNAME), SOA (Start of Authority), and NS (Name Server). An Address (A) record is the most common type of resource record where its core functionality is to map a hostname to an IPv4 address. A CNAME record is used to specify that a domain name is an alias of another, canonical domain name. An SOA record is used to specify authoritative information about a DNS zone, including the primary name server, the email of the domain administrator, and several timers relating to refreshing the zone. An NS record is used to delegate a DNS zone to use a given authoritative name server.
To add a resource record, enter the Name of the resource record, select a Type of resource record, and then enter all required fields pertaining to the resource record such as Address for A Record, Host Name for CNAME, or Server Name for NS Record and then click Add. To modify an existing resource record, select the resource record from the list, edit the fields you want to change, and then click Save when you are done. If you want to remove a resource record, just select the resource record from the list and click Remove.
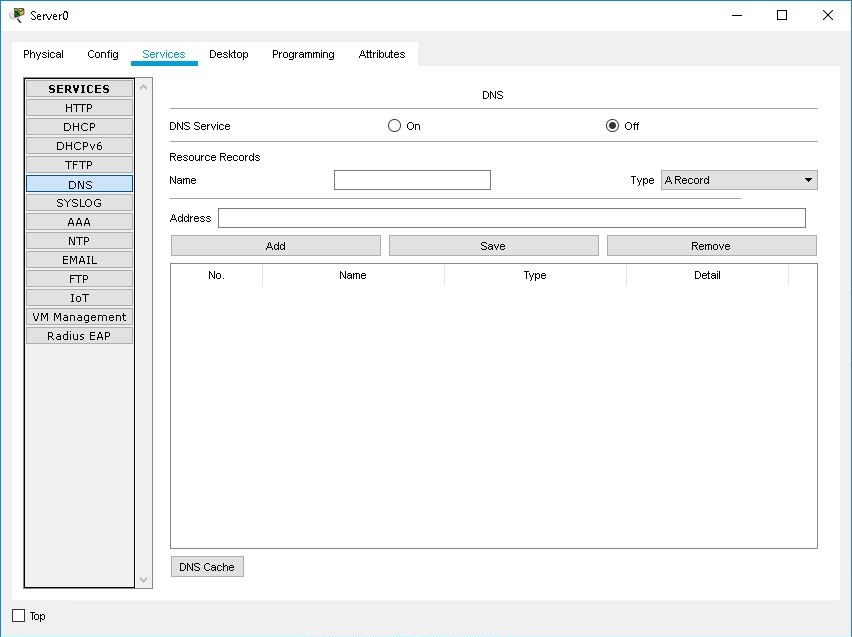
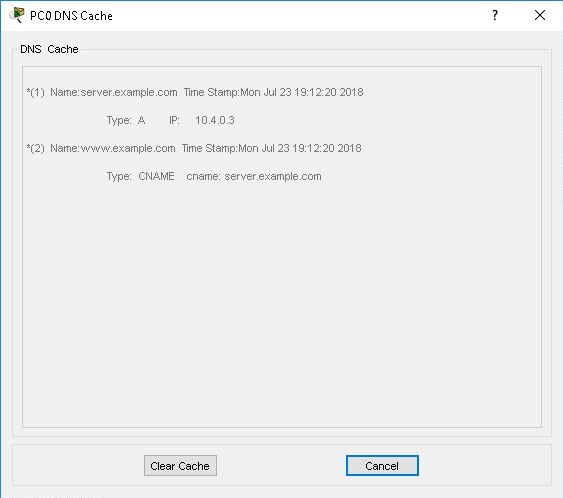
When you click on the DNS Cache button, you can view all of the queries cached by the DNS server. The cached queries will be retained on the DNS server for a period of time (TTL) set on the record stored on the SOA DNS server.
SYSLOG Service Configuration
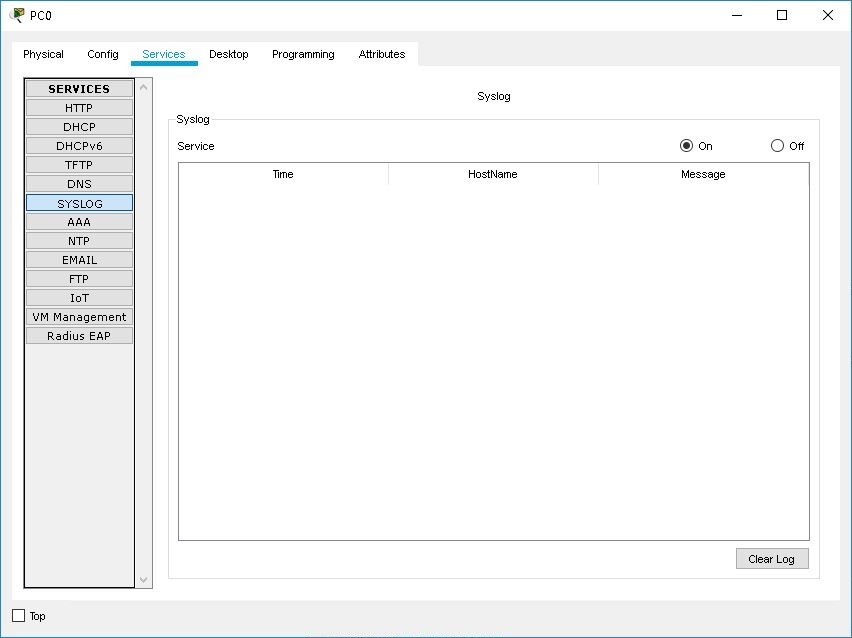
In the SYSLOG service configuration, there are no parameters to set. The SYSLOG service logs messages from routers and switches in the network. For each entry, the Time, HostName, and the actual Message are logged in the server.
AAA Service Configuration
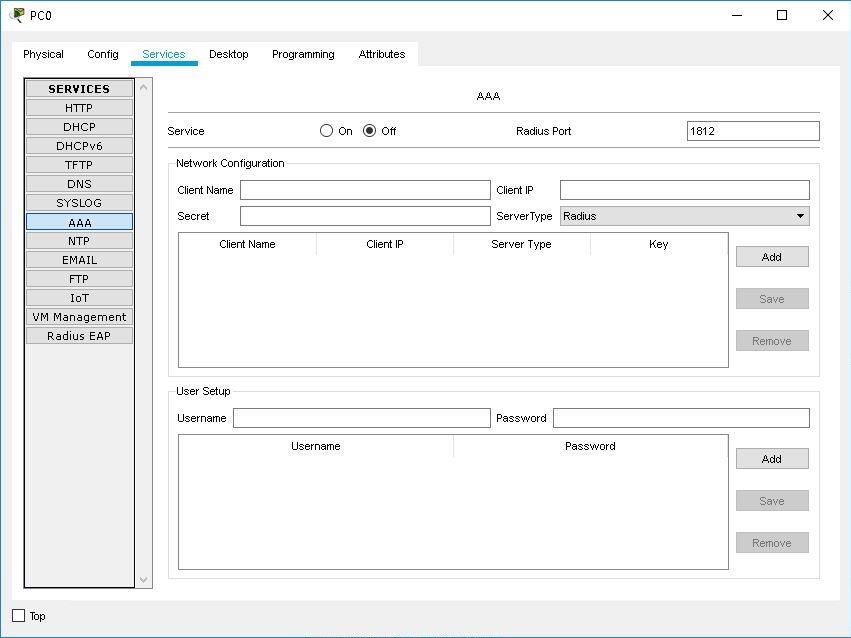
In the AAA service configuration, you can set up the server to be a RADIUS or TACACS server. To add a RADIUS or TACACS server, enter the Client Name, Client IP, Secret key, select either Radius or Tacacs as the Type of AAA server, and then click on the + button. To remove a AAA server, select the AAA server entry in the list and click on the - button. In addition to configuring the AAA server, you also need to add authorized users. To add authorized users, enter the UserName and Password for the user and click on the + button. If you want to remove a user, select the user from the list and click on the - button.
NTP Service Configuration
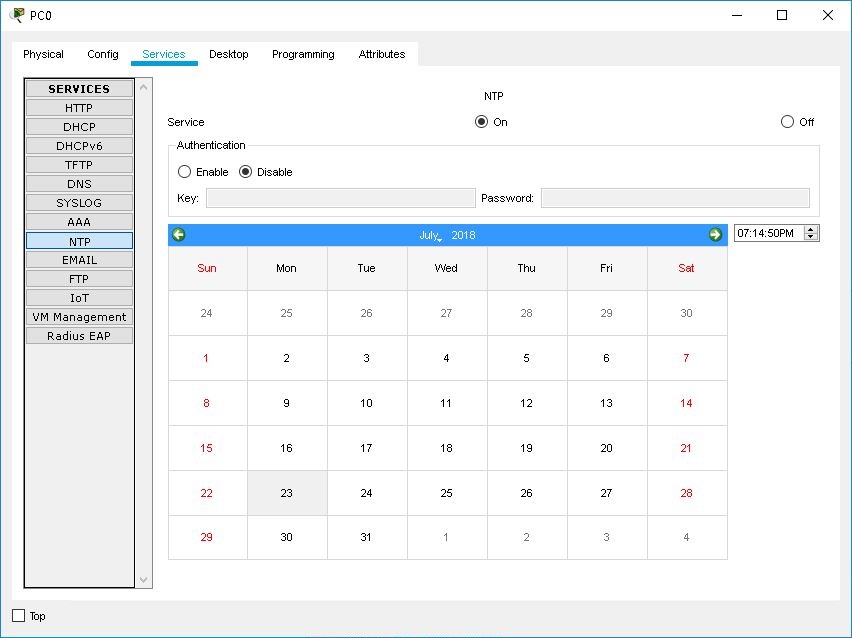
In the NTP service configuration, you can set up the server to be an NTP server so that the date and time on the configured routers and switches are synchronized. By default, the date and time on the server is synchronized with your local machine. If you wish, you can manually set the time and date by selecting the date on the calendar display and incrementing or decrementing the time display. You can also set up Authentication by clicking on Enable and then entering a Key and Password.
Email Service Configuration
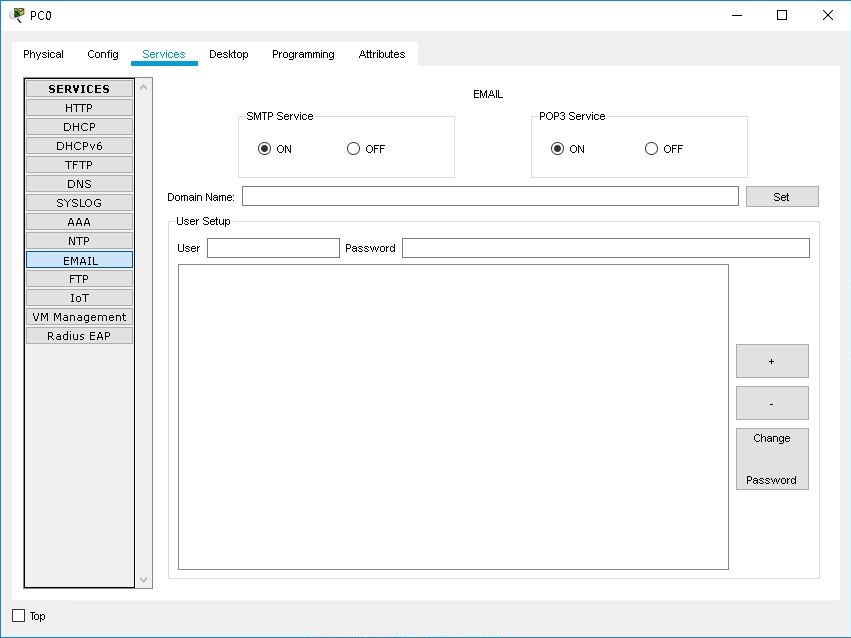
In the Email service configuration, you can set up the server to use the SMTP and/or POP3 protocol(s). To configure an email server, first enter a Domain Name and then click the Set button. Next, enter a User name and Password then click the Add button to create an email account. To change a password on an email account, select the desired email account from the list and click Change Password button. A dialog will appear allowing you to enter the new password. To delete an email account, select the desired email account from the list and click the Delete button.
FTP Service Configuration
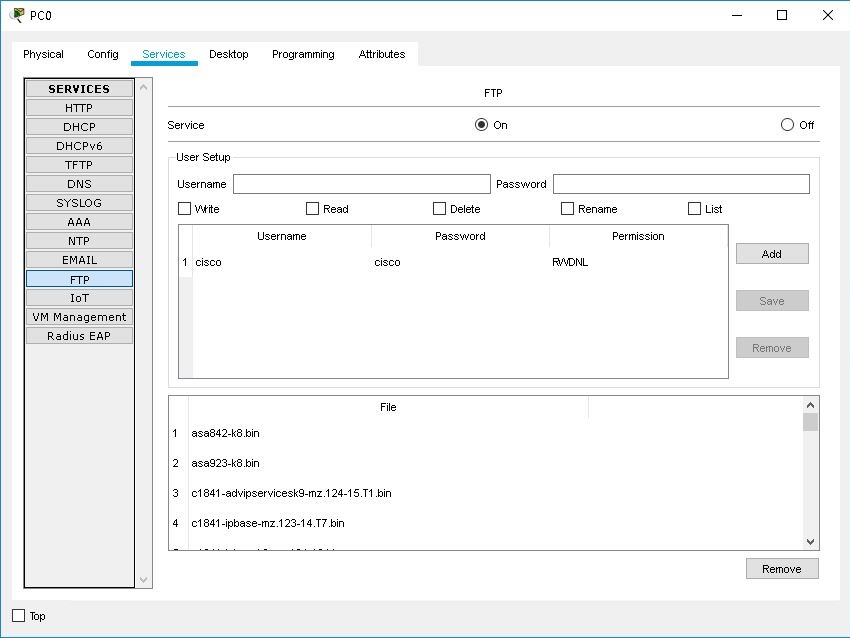
In the FTP service configuration, you can add and remove FTP accounts, modify FTP account permissions, and remove files from the FTP service. To add an FTP account, enter a UserName and Password. Then, select which permissions you would like the user to have such as Write, Read, Delete, Rename, and List. Finally, click the Add button to create the FTP account. To remove an FTP account, select the desired FTP account from the list and click on the Delete button. If you want to remove files from the FTP service, select the desired file from the file list and click on the Remove button.
Interface Configuration
Servers can support two interfaces. You can choose from Ethernet (copper or fiber), modem, or wireless interfaces. In general, you can set the Port Status, Bandwidth, Duplex, MAC Address, IP Address, Subnet Mask, Link Local Address, and IPv6 Address. These options vary slightly for each interface type.
IP Configuration Utility
On the Desktop tab, click the IP Configuration icon to bring up the configuration utility. If the end device is connected to a DHCP configured router or server, you can use DHCP to automatically obtain the IP configuration by clicking on the DHCP button. Otherwise, you may use the Static button to manually set the IP configuration.
Command Prompt Utility
On the Desktop tab, click the Command Prompt button to bring up the command line utility. At the command prompt, you can issue the following commands:
|
Traffic Generator Utility
The Traffic Generator utility is similar in functionality to the Add Simple PDU and Add Complex PDU tool in the Common Tools Bar, but with some key differences. The Traffic Generator utility is explained in detail in Configuring PCs, Laptops, Tablet PCs, and PDAs.
Text Editor Utility
On the Desktop tab, click the Text Editor icon to bring up the text editor. You can create New text files, Open existing text files, and Save text files through the File menu in the text editor. There are no formatting choices available in the text editor.
Web Browser Utility
On the Desktop tab, click the Web Browser button to bring up the web browser. The web browser allows you to access a web server or the WRT300N Web Configuration interface. If the end device is directly or indirectly connected to a server with HTTP service enabled, you can type in the IP address of the server to access the website on the server. If the end device is connected to a properly configured DNS server, covered in another help topic, you can type in the domain name of the server. If the end device is connected to a WRT300N wireless router, you can type in the IP address of the WRT300N wireless router to access the Web Configuration. A prompt will appear asking for user name and password. The default is admin for both user name and password.
PPPoE Dialer Utility
On the Desktop tab, click the PPPoE Dialer button to bring up the PPPoE Dialer utility. This utility allows you to establish a point-to-point connection to a PPPoE server. To establish a PPPoE connection, enter the User Name and Password and then click on the Connect button. To disconnect the PPPoE connection, click on the Disconnect button.
VPN Utility
On the Desktop tab, click the VPN button to bring up the VPN client utility that allows you to create a VPN connection to a VPN server. To create a VPN connection, enter the GroupName, Group Key, Host IP (Server IP), Username, Password, and then click on the Connect button. To disconnect the VPN connection, click on the Disconnect button.