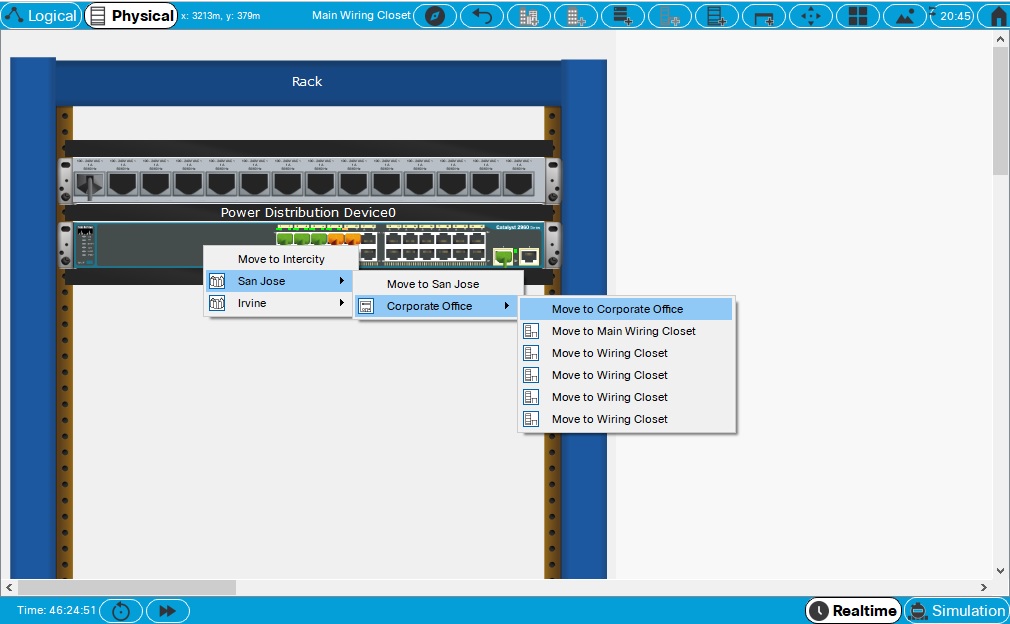
The Physical Workspace: Moving Devices
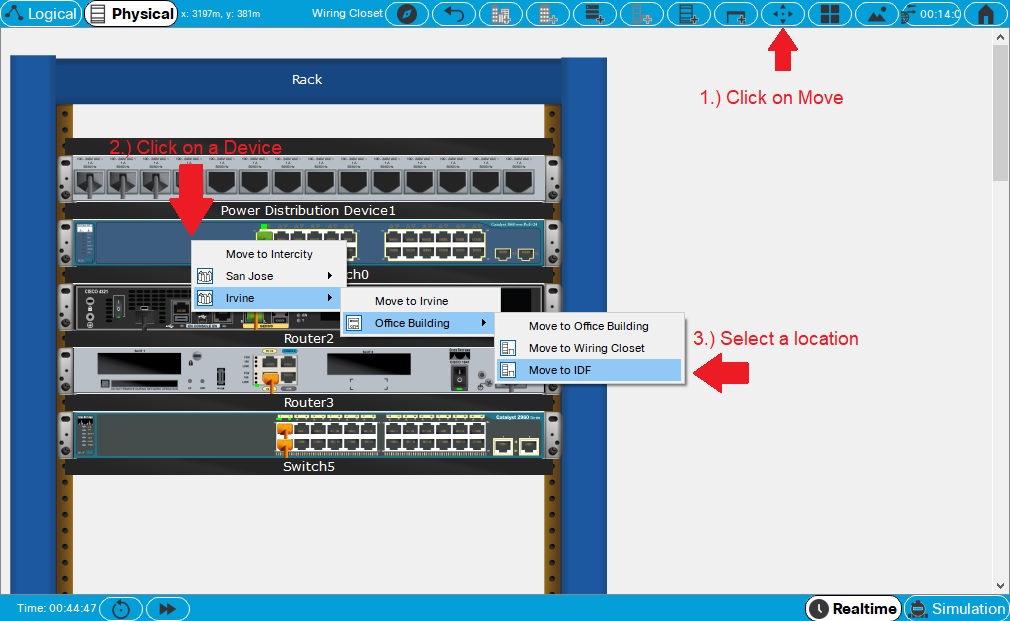
The Physical Workspace allows you to move your devices to various locations. To move devices up or down the rack, drag the device to an empty slot on the rack. To move devices elsewhere, click on the Move Object button on the Physical Workspace Bar, then click on the device to be moved. When the device is clicked, an expandable pop-up box will appear that shows a hierarchical layout of the physical workspace. Just click on the level that you want the selected device to be moved. When you move a device to a new level, it always initially appears in the top left corner of the workspace. In addition to moving devices with the Move Object button, you can also move cities, buildings, wiring closets and generic containers. The procedure is the same.

If you move multiple devices before moving them out of the upper left, they are stacked on top of each other in the same physical location. Clicking will select the top device on the stack, dragging around the group will select all the devices and allows them all to be moved simultaneously.
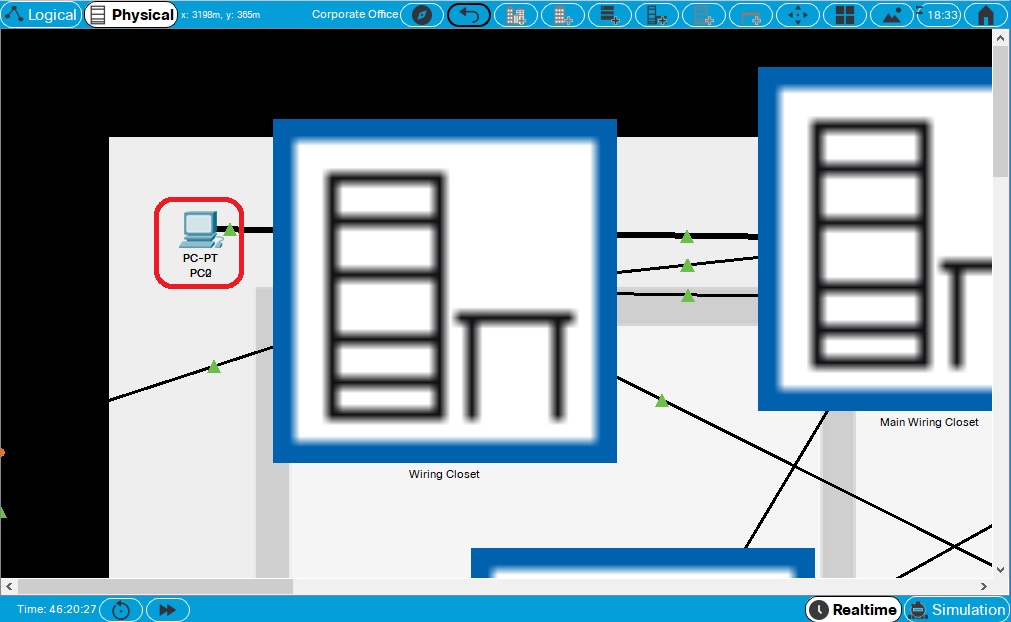
A second more efficient way to quickly move multiple devices is to use the Navigation button on the Physical Workspace Bar. Clicking on the Navigation button reveals an expanded tree view of the arrangement of all containers and devices in the Physical Workspace.
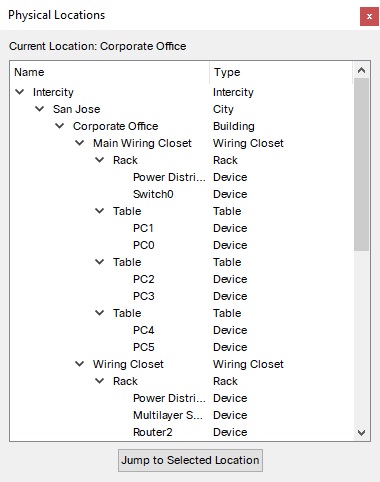
To move a device to a new location using the Navigation button, highlight the device and drag it to the new location in the tree. When that level is in focus, the device(s) will be located in the upper left corner of that level. This is with the exception of the wiring closet view where the devices will appear in a rack or on a table. There is no way to change the order of equipment in the rack or on the tables.
There are few restrictions on where you can move objects and devices. In general, something bigger (a city) cannot be moved inside something smaller (a building); otherwise, all moves are possible. You can move buildings to other cities or directly onto the intercity. Wiring closets can be placed directly onto cities or the intercity view. Devices are not confined by racks or tables and can go anywhere. However, you should maintain their hierarchy to avoid confusion. Another possible restriction on moving one container into another is based on relative container volumes, such that a larger by volume container can not be moved into a smaller one. Container volume settings can be adjusted by using Set Background from the Physical Workspace Bar
In this example, the default "Home City" is renamed to "San Jose," and a new city called "Irvine" is created. Inside San Jose is a building called "Cisco," which has a wiring closet called "MDF." Similarly, Irvine has a building called "Office" which has a wiring closet called "IDF." Initially, all devices are located in the MDF, including two routers named "Router0" and "Router1," which are connected via a serial link.
If, for example, you want to move Router0 into the IDF, you would first need to go into the MDF. Inside the MDF, click the Move Object button. Click on Router0, and then go through the hierarchy to find the IDF and select Move to IDF.
If you back out to Intercity view, you will see a black line between Irvine and San Jose. The line tells you that there is a connection between the devices of these cities. In this case, the line represents the serial connection between Router0 and Router1.
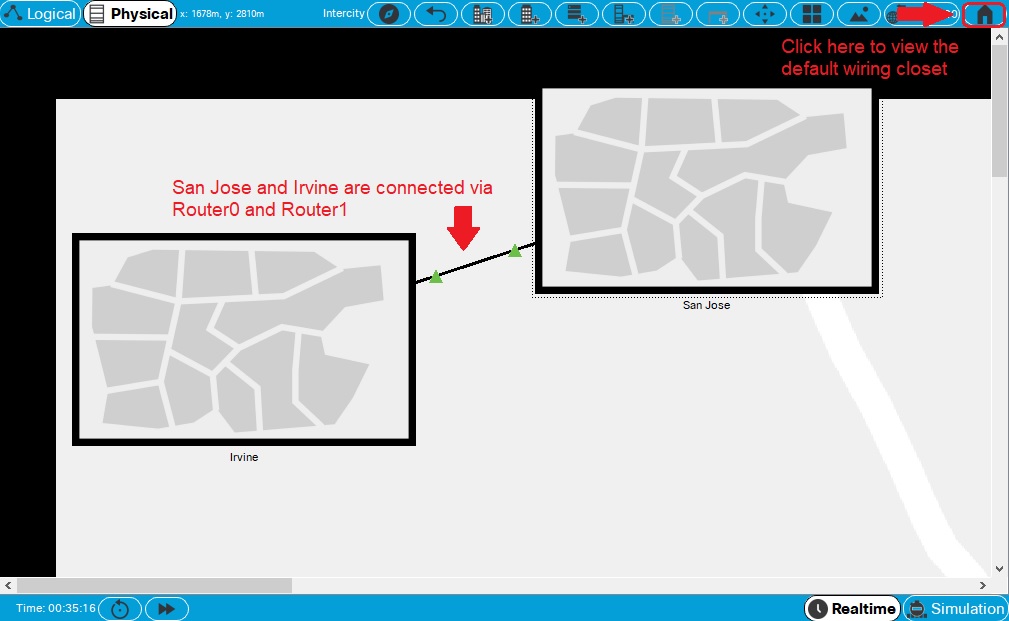
You can quickly return to the default wiring closet in any environment by pressing the Working Closet button on the far right of the Physical Workspace Bar. |